Table of Contents
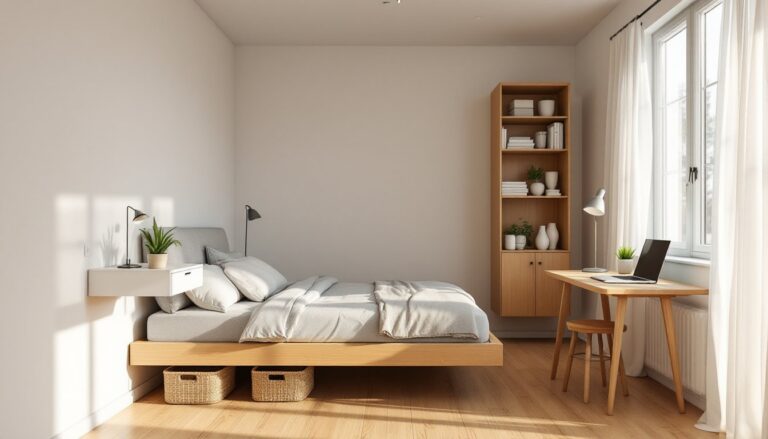
ToggleBuilt-in cabinets can turn a cluttered spare bedroom into a functional home office that rivals any corporate setup. Unlike freestanding furniture that shifts, wobbles, and leaves gaps, built-ins use every inch from floor to ceiling, creating seamless storage that actually stays organized. They add resale value, eliminate the visual chaos of mismatched shelving, and can be tailored to the exact gear and workflow each homeowner needs. Whether tackling a DIY build or hiring a finish carpenter, the investment pays off in both daily productivity and long-term property appeal.
Key Takeaways
- Built-in home office cabinets maximize vertical storage by reaching from floor to ceiling, capturing dead space and adding measurable resale value compared to freestanding furniture.
- Proper planning requires detailed measurements at multiple heights, cataloging all equipment and supplies, and accounting for desk height (29–30 inches standard) and depth (24–30 inches comfortable) before construction begins.
- Quality materials like three-quarter-inch cabinet-grade plywood ($60–$90 per sheet) and professional hardware such as soft-close hinges deliver durability and a finished appearance that lasts decades.
- DIY builders with basic tools can complete a functional built-in cabinet project for $500–$1,200 in materials, while hiring a finish carpenter ($50–$100/hour) makes sense for complex joinery or out-of-plumb walls.
- Smart storage features—adjustable shelving, cable management grommets, pull-out trays, and integrated LED lighting—transform built-in cabinets into highly functional workspaces that reduce clutter and enhance daily productivity.
- L-shaped and floor-to-ceiling configurations paired with floating desks create ergonomic, professional-grade home offices that feel intentional and architecturally integrated rather than improvised.
Why Built In Cabinets Are the Ultimate Home Office Upgrade
Built-in cabinets deliver three benefits that off-the-shelf furniture can’t match: full-height storage, structural stability, and tailored dimensions. A standard bookcase stops at 72 inches: built-ins reach the ceiling, capturing dead vertical space and keeping rarely used files or equipment out of the way.
Because they’re anchored to wall studs and often tied into adjacent walls or a desktop, built-ins don’t tip, sway, or need L-brackets. That makes them safer in homes with kids or pets and allows for heavy-duty shelving that can hold printers, binders, and equipment without sagging.
Custom dimensions mean no awkward gaps beside windows or doorways. A built-in can wrap around obstacles, incorporate electrical outlets mid-shelf, or house desk returns at precisely the right height for ergonomic typing. Homeowners planning to sell will find that buyers value permanent, professional-grade office infrastructure, especially as remote work becomes standard.
Finally, built-ins offer modular configurations without the modular price tag when done DIY. Once installed, they blend into the architecture, making even a small room feel intentional rather than improvised.
Planning Your Built In Cabinet Layout
Effective planning starts with a scaled floor plan, graph paper or a free CAD tool works fine. Mark door swings, windows, electrical outlets, and HVAC vents. Measure twice: the cost of a miscut panel or a cabinet blocking a register is high.
Measuring Your Space and Determining Storage Needs
Use a tape measure and laser level to record wall length, ceiling height, and baseboard depth. Note that walls are rarely plumb: measure at multiple heights and use the smallest dimension to avoid gaps. Record both nominal and actual measurements, what looks like an 8-foot wall may be 95¾ inches once you subtract trim.
Catalog everything the cabinets will store: laptop, monitor, printer, paper reams, reference books, charging cables, office supplies. Measure bulky items like a multifunction printer (often 18 × 18 × 12 inches) so shelves aren’t too shallow. Standard file folders need 12 inches of depth: legal-size folders need 15 inches.
Decide on desk height early. Standard is 29 to 30 inches, but taller users may want 31 inches, and anyone using a keyboard tray should account for that 2-inch drop. Plan for a minimum desk depth of 24 inches: 30 inches is more comfortable for dual monitors. If the desk will be part of the built-in, consider a cantilevered or floating design to keep legroom open underneath.
Choosing Materials and Finishes for Your Cabinets
Plywood is the gold standard for built-ins. Three-quarter-inch cabinet-grade plywood (maple, birch, or oak veneer) is stable, strong, and finishes cleanly. Avoid big-box “sanded pine plywood”, it’s often full of voids and won’t hold screws reliably. Expect to pay $60–$90 per 4 × 8 sheet for quality hardwood plywood in most markets.
MDF (medium-density fiberboard) is cheaper and delivers glass-smooth painted finishes, but it’s heavy and less forgiving with moisture or screw pull-out. Use MDF for face frames, door panels, or painted applications: stick with plywood for structural carcasses.
Solid wood face frames (1 × 2 poplar or maple) add a professional look and provide strong mounting points for hinges and drawer slides. Face frames also hide plywood edges and allow for easier scribing to uneven walls.
Finish options depend on whether the homeowner paints or stains. For paint, prime all surfaces with a shellac-based primer (BIN or Zinsser Cover Stain) to seal tannins and MDF dust, then apply two coats of satin or semi-gloss latex. For stain, sand to 220 grit, apply pre-stain conditioner on soft woods, then use oil-based polyurethane for durability.
Hardware matters. Blum or Salice soft-close hinges cost $4–$8 per pair but eliminate door slam and last decades. Drawer slides should be full-extension, side-mount, rated for 75–100 pounds. Inspiration galleries on Houzz showcase hundreds of finish and hardware combinations for every style.
DIY Installation vs. Hiring a Professional
A motivated DIYer with a table saw, miter saw, drill, and pocket-hole jig can build and install basic built-in cabinets over a long weekend. Total material cost typically runs $500–$1,200 for an 8-foot wall of floor-to-ceiling cabinets, depending on plywood grade and hardware choices. Beginner-friendly methods like face-frame construction and pre-finished panels keep complexity manageable.
Tools required include a circular saw or table saw for sheet goods, a miter saw for face frames, a drill with countersink bits, a pocket-hole jig (Kreg K5 or similar), clamps, a laser or bubble level, and a stud finder. Safety gear, dust mask, safety glasses, and hearing protection, is non-negotiable when cutting plywood and MDF.
Hiring a finish carpenter or cabinet installer makes sense if the project involves complex joinery (dovetails, dados), large spans that need reinforcement, or tricky scribing around out-of-plumb walls. Pros charge $50–$100 per hour or quote per linear foot ($150–$400/ft installed, depending on region and finish complexity). Permits aren’t usually required for non-structural built-ins, but any work that affects electrical or load-bearing walls needs inspection and possibly a licensed contractor.
Homeowners short on time but eager to keep costs down can split the difference: order cabinet boxes from a local shop (or even IKEA SEKTION cabinets) and handle installation, trim, and finishing themselves. This hybrid approach leverages precision factory cuts while keeping labor in-house.
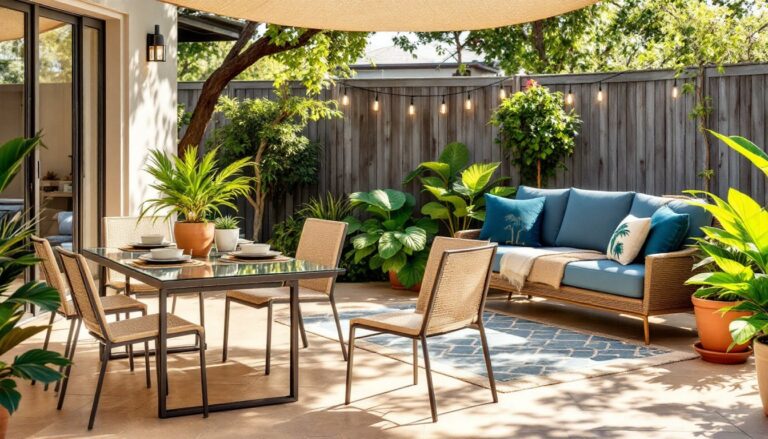
Design Ideas and Configuration Options
Floor-to-ceiling towers flanking a central desk create a library-like feel and maximize vertical storage. Upper cabinets with doors hide clutter: open shelving at eye level keeps frequently referenced books and decorative items accessible. Consider a mix: closed cabinets on one side, open shelves on the other, to balance function and visual interest.
L-shaped configurations work well in corner offices, providing ample desktop real estate while anchoring the built-in to two walls for stability. This setup pairs naturally with L-shaped desks and allows one leg of the desk to serve as a workspace, the other as a return for a printer or task lamp.
Floating desks cantilevered from the cabinet frame eliminate bulky legs and create a streamlined look. Use 2 × 4 cleat support screwed into studs every 16 inches, then overlay with a 1½-inch-thick hardwood or plywood desktop. This method requires careful layout, mark stud locations before drywall if building new construction, and can support 200+ pounds when properly anchored.
Integrated lighting transforms built-ins from functional to architectural. LED puck lights or strip lighting under upper cabinets illuminate the desk without glare. Install on a dimmer for flexibility. Wire lights to an existing outlet or, if the project involves drywall work, have an electrician add a switched circuit.
Choosing paint colors that complement both the built-ins and the room’s overall palette helps the office feel cohesive rather than tacked-on.
Maximizing Functionality With Smart Storage Features
Adjustable shelving is a must. Drill holes for shelf pins every 2 inches along the inside of cabinet sides: this lets shelves move as storage needs evolve. Use ¼-inch hardboard or ¾-inch plywood for shelves, and add a hardwood nosing to the front edge for a finished look and extra strength.
Drawer banks below the desk handle small supplies, charging cables, and personal items. Use Baltic birch plywood drawer boxes with dovetail or rabbet joints for longevity. Install soft-close slides and size drawers to fit standard office organizers, most are designed around 12- or 15-inch-wide compartments.
Cable management prevents the rat’s nest of cords that plagues most desks. Drill 2-inch grommets in the desktop near the back edge, route power and data cables through, and use adhesive cable clips on the underside or back panel. For a cleaner approach, incorporate a vertical chase, a narrow open column behind the desk, where cables drop from the desktop to a power strip anchored low in the cabinet.
Pull-out trays for keyboards or laptops keep the desktop clear. Mount on undermount slides rated for the device’s weight plus typing force. A pull-out printer shelf saves space and keeps the device hidden until needed, which contributes to a streamlined home workspace aesthetic.
File drawers should be deep (at least 12 inches front-to-back for letter, 15 inches for legal) and use heavy-duty slides rated for 100 pounds. Drawer fronts sized to match cabinet doors create a unified look.
Finally, consider a message center or corkboard panel inside a cabinet door for pinning reminders, or a shallow drawer with dividers for pens, sticky notes, and stamps. These micro-zones reduce desk clutter and keep essentials within arm’s reach. Detailed project walkthroughs on sites like The Handyman’s Daughter offer step-by-step methods for building custom storage inserts.
Built-in cabinets don’t just organize, they anchor the room. With thoughtful planning, quality materials, and attention to the details that make daily work easier, they transform any home office into a space that feels both permanent and personal. Whether building from scratch or adapting a kit system, the result is a workspace that works as hard as the person using it and delivering the kind of home office inspiration that makes every project feel achievable.