Table of Contents
ToggleA cluttered desk kills productivity faster than a dead laptop battery. When papers pile up, books migrate to the floor, and office supplies stage a takeover, even the most organized person struggles to focus. The fix isn’t buying more desk organizers, it’s reclaiming vertical space with strategically placed shelving. Home office shelves turn blank walls into functional storage, keeping essential items within arm’s reach while clearing workspace for actual work. Whether working from a spare bedroom or a converted closet, the right shelving system makes a cramped office feel spacious and a chaotic one feel professional.
Key Takeaways
- Home office shelves reclaim vertical wall space, freeing up desk real estate and boosting productivity by keeping frequently used materials visible and accessible.
- Floating shelves work best for light to medium loads (25-50 pounds per linear foot) and suit modern minimalist offices, while built-in shelving handles heavier loads and maximizes long-term storage capacity.
- Proper shelf selection depends on measuring wall space, calculating weight requirements, and choosing appropriate depth (6-8 inches for decor, 10-12 inches for books, 14-16 inches for heavy equipment).
- Installation success requires locating studs 16 inches on-center, drawing level lines, and securing brackets with 2.5-3 inch screws, followed by a load test before adding items.
- Strategic organization of home office shelves using frequency-based zoning, labeled containers, and mixed display elements creates both functional storage and professional aesthetics during video calls.
- A well-shelved office increases credibility with clients and colleagues while adapting quickly to evolving work needs through adjustable systems and flexible configurations.
Why Home Office Shelves Are Essential for Productivity
Open shelving doesn’t just store stuff, it changes how a workspace functions. Vertical storage frees up desk real estate for monitors, keyboards, and the projects that matter. Instead of stacking reference books on the floor or burying file folders in drawers, shelves keep frequently used materials visible and accessible.
The psychological benefit runs deeper than organization. A well-shelved office signals professionalism during video calls, eliminating the scramble to blur backgrounds or angle the camera away from clutter. When clients or colleagues see curated shelves instead of chaos, credibility increases.
Shelves also solve the problem of evolving work needs. Unlike closed cabinets, they adapt quickly, add a basket for cords this month, swap in decorative objects next month, reorganize completely when the next project demands it. This flexibility matters for anyone who juggles multiple roles or shifts between creative and administrative tasks.
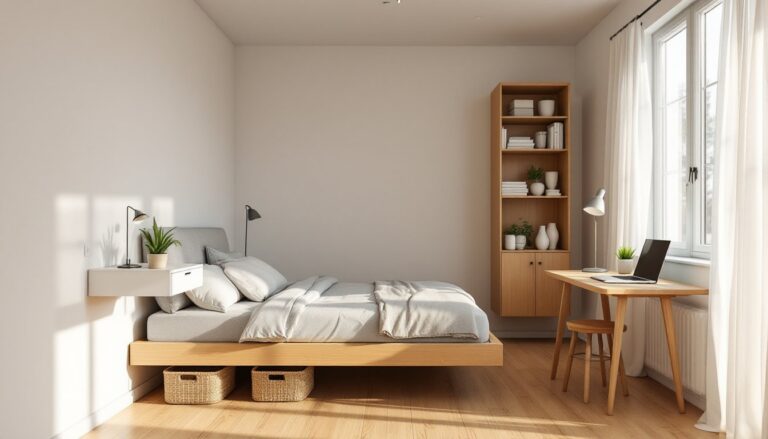
For smaller home offices, shelving becomes non-negotiable. A 10×10 room maxes out floor space quickly, but walls offer 100+ square feet of untapped storage potential. Adding shelves above the primary work surface doubles usable space without requiring a larger footprint or major renovation.
Types of Shelving Solutions for Your Home Office
Choosing the right shelf type depends on wall structure, weight requirements, and how permanent the installation needs to be. Each style offers distinct advantages.
Floating Shelves
Floating shelves mount directly to wall studs using concealed brackets, creating a clean, minimalist look without visible hardware. They work best for light to medium loads, think books, binders, small electronics, and decorative items.
Typical floating shelf capacities range from 25-50 pounds per linear foot, depending on bracket quality and stud attachment. For a standard 36-inch shelf, that translates to roughly 75-150 pounds total. Exceeding this risks bracket failure or drywall damage.
Installation requires hitting at least two 16-inch on-center studs with lag bolts or heavy-duty screws. Hollow-wall anchors work for very light items (under 10 pounds), but they’re unreliable for anything heavier. If studs don’t align with the desired shelf location, a cleat-mounted system, a horizontal board screwed into multiple studs with the shelf sitting atop it, distributes weight more evenly.
Floating shelves shine in modern or Scandinavian-inspired offices where clean lines matter. They’re also ideal above desks in compact workspaces where floor-to-ceiling bookcases would overwhelm the room.
Built-In and Custom Shelving
Built-in shelving involves constructing a fixed framework anchored to studs, often floor-to-ceiling. This approach handles heavier loads, reference libraries, filing systems, or equipment, and maximizes every inch of available wall space.
A basic built-in uses 1×12 or 3/4-inch plywood shelves supported by vertical standards (side panels or adjustable track systems). Shelves longer than 36 inches should include a center support or corbel to prevent sagging under weight. For heavier loads, hardwood or doubled plywood increases rigidity.
Custom built-ins require more carpentry skill but deliver unmatched flexibility. Adjustable shelving systems, like metal standards and brackets, let users reposition shelves as storage needs change, critical for anyone whose office furniture setup evolves over time.
This route makes sense for long-term home offices where the investment pays off. It also adds resale value, especially in dedicated office rooms or libraries. For renters or those planning to move, modular shelving units (freestanding bookcases, cube organizers) offer similar capacity without permanent modification.
How to Choose the Right Shelves for Your Space
Selecting shelves starts with measuring three things: wall space, load capacity, and clearance. Skipping this step leads to shelves that don’t fit, sag under weight, or block light switches.
First, measure wall width and height, noting the location of studs with a stud finder. Standard stud spacing is 16 inches on-center in most residential construction, though older homes sometimes use 24-inch spacing. Knowing stud locations determines shelf length and bracket placement.
Next, calculate weight requirements. A shelf holding decorative items needs far less support than one loaded with textbooks or equipment. As a rule:
- Light loads (photos, small decor): 15-25 lbs per shelf
- Medium loads (mixed books, binders, small electronics): 30-60 lbs per shelf
- Heavy loads (reference books, printers, monitors): 75+ lbs per shelf
Shelf material matters here. Solid wood (oak, maple, walnut) handles heavy loads gracefully but costs more. Plywood offers good strength at lower cost, especially Baltic birch or cabinet-grade plywood. MDF (medium-density fiberboard) works for light loads but sags over time under weight and doesn’t hold screws as securely.
Shelf depth should match what’s being stored. Standard depths include:
- 6-8 inches: Shallow shelves for small items, picture frames, or tight spaces
- 10-12 inches: Books, binders, most office supplies
- 14-16 inches: Deep storage for file boxes, large equipment, or multi-row book storage
Consider clearance around obstacles. Shelves above desks need enough height for monitors and task lighting, typically 18-24 inches minimum. Shelves near doors should clear the swing arc, and those near windows shouldn’t block natural light unnecessarily.
Finally, think about aesthetics relative to the rest of the office. Dark walnut shelves complement traditional setups, while white or light oak suits modern minimalist spaces. If the office includes ergonomic desk choices or specific design themes, shelves should echo that style rather than clash with it.
Installing Home Office Shelves: A Step-by-Step DIY Guide
Installing shelves isn’t complicated, but it requires precision. Crooked shelves look unprofessional, and improperly anchored ones fail under load. Here’s how to do it right.
Tools needed:
- Stud finder (magnetic or electronic)
- Level (24-inch or longer)
- Drill/driver with bits
- Tape measure
- Pencil
- Safety glasses
Materials:
- Shelves (wood, metal, or composite)
- Brackets or concealed mounts
- 2.5-3 inch screws (for stud mounting)
- Wall anchors (if avoiding studs is unavoidable)
Step 1: Locate studs
Use a stud finder to mark stud centers along the wall. Mark multiple studs to confirm spacing, most are 16 inches apart. If planning multiple shelves, map out studs across the entire installation area.
Step 2: Mark shelf height
Measure up from the floor (or desk surface) to the desired shelf height. Use a level to draw a light horizontal line where the bottom of the shelf will sit. Double-check with a 4-foot level if installing long shelves, small errors compound over distance.
Step 3: Attach brackets
Position brackets along the level line, aligning them with stud locations. Drill pilot holes slightly smaller than the screw diameter to prevent splitting. Drive screws through brackets into studs using a drill or impact driver. For floating shelves with concealed mounts, follow manufacturer instructions, most require drilling into the shelf back and sliding it onto wall-mounted rods.
Step 4: Install shelves
Place shelves on brackets and secure with screws from below (if brackets allow). Check level again, shimming under one bracket can correct minor discrepancies. For adjustable systems, snap shelf clips into standards at the desired height.
Step 5: Load test
Before adding books or equipment, test the shelf with moderate weight. Press down firmly at the center and ends. Any flex, creaking, or movement means inadequate support, add a center bracket or verify stud attachment.
Safety note: Wear safety glasses when drilling overhead to protect eyes from dust and debris. If working above shoulder height for extended periods, use a step ladder rated for your weight plus tools, not a chair or makeshift platform.
For anyone tackling their first shelving project, simple DIY tutorials provide additional visual guidance and material lists. Beginners often benefit from practicing on a single shelf before committing to a full wall installation.
Creative Organization Ideas for Office Shelves
Shelves installed, it’s time to make them work harder. Thoughtful organization turns storage into a system.
Zone by frequency of use. Place daily essentials, notebooks, pens, charging cables, at eye level within easy reach. Archive boxes, reference manuals, and seasonal items go on higher or lower shelves. This reduces unnecessary movement and keeps the workspace efficient.
Use containers strategically. Woven baskets, acrylic bins, and wooden boxes corral small items that otherwise scatter. Label bins for faster retrieval, “cables,” “office supplies,” “client files.” Clear containers work well for items that need visual identification: opaque ones hide clutter.
Mix function with display. Shelves don’t have to be purely utilitarian. Alternating books with plants, framed photos, or sculptural objects breaks monotony and adds personality. For masculine office setups, industrial metal bins or leather desk accessories provide visual interest without sacrificing function.
Integrate lighting. LED strip lights or small puck lights under shelves illuminate work surfaces and highlight displayed items. Battery-operated options avoid wiring hassles, though plug-in versions offer consistent brightness. Proper lighting becomes especially important in offices relying on task lamps for ambient illumination.
Consider adjustability. Even fixed shelves benefit from movable elements, stackable trays, adjustable bookends, modular drawer inserts. As projects change, the ability to reorganize without reinstalling hardware saves time.
Prevent shelf sag. Distribute weight evenly across the shelf length. Concentrate heavy items near bracket supports rather than at the center. For long spans, add a center bracket or replace with thicker material. A sagging shelf doesn’t just look bad, it eventually fails.
Many homeowners find inspiration and storage ideas by studying office setups in design galleries or productivity blogs. The key is adapting those ideas to actual work habits rather than copying aesthetics that don’t match daily routines.
For readers exploring broader organizational strategies, resources like The Handyman’s Daughter offer project-based approaches to custom storage solutions beyond standard shelving.
Final thought: Home office shelves aren’t just about storage, they’re infrastructure. The right setup supports productivity, adapts to changing needs, and turns a makeshift workspace into a place where focused work actually happens. Whether installing a single floating shelf or building floor-to-ceiling built-ins, the effort pays off every time clutter stays off the desk and work flows uninterrupted.